Model Name: AU11/2
(For Conexant Chipset)
Version: 00
Table of Contents:
FCC Part 68
FCC Part 15
Chapter 1 Introduction
Chapter 2 Determine your connection settings
Chapter 3 Install the driver and make a connection
Chapter 3.1 Windows 98/98SE
Chapter 3.1.1 Setting the ADSL VPI & VCI For RFC
1483/2364/2516
Chapter 3.1.2 Making a RFC 1483 connection - Win98/98SE
Chapter 3.1.3 Making a RFC 2364/2516 connection - Win98/98SE
Chapter 3.2 Windows 2000
Chapter 3.2.1 Setting the ADSL VPI & VCI For RFC
1483/2364/2516
Chapter 3.2.2 Making a RFC 1483 connection - Win2000
Chapter 3.2.3 Making a RFC 2364/2516 connection - Win2000
Chapter 3.3 Windows Me
Chapter 3.3.1 Setting the ADSL VPI & VCI For RFC
1483/2364/2516
Chapter 3.3.2 Marking a RFC 1483 Connection - WinMe
Chapter 3.3.3 Making a RFC 2364/2516 Connection - WinMe
Chapter 3.4 Windows
XP
Chapter 3.4.1 Setting the ADSL VPI & VCI For RFC
1483/2364/2516
Chapter 3.4.2 Marking a RFC 1483 Connection - WinXP
Chapter 3.4.3 Making a RFC 2364/2516 Connection - WinXP
Declaration
of CE
Declaration of conformity to type
FCC
Part 68
This equipment complies with Part 68 of the FCC Rules. On the bottom
of this equipment is a label that contains the FCC Registration Number
and Ringer Equivalence Number (REN) for this equipment. You must provide
this information to the telephone company upon request.
The REN is useful to determine the quantity of devices you may connect
to the telephone line and still have all of those devices ring when your
number is called. In most, but not all areas, the sum of the REN of all
devices connected to one line should not exceed five (5.0). To be certain
of the number of devices you may connect to your line, as determined by
the REN, you should contact your local telephone company to determine
the maximum REN for your calling area.
If the modem causes harm to the telephone network, the telephone company
may discontinue your service temporarily. If possible, they will notify
you in advance. But if advance notice isn't practical, you will be notified
as soon as possible. You will be advised of your right to file a complaint
with the FCC.
The telephone company may make changes in its facilities, equipment, operations,
or procedures that could affect the proper operation of your equipment.
If they do, you will be notified in advance to give you an opportunity
to maintain uninterrupted telephone service.
If you experience trouble with this modem, please contact your dealer
for repair/warranty information. The telephone company may ask you to
disconnect this equipment from the network until the problem has been
corrected or you are sure that the equipment is not malfunctioning.
This equipment may not be used on coin service provided by the telephone
company. Connection to party lines is subject to state tariffs.
Installation
This device is equipped with a USOC RJ11C connector.
Table of Contents
FCC
Part 15
The modem generates and uses radio frequency energy. If it is not installed
and used properly in strict accordance with the user's manual, it may
cause interference with radio and television reception. The modem has
been tested and found to comply with the limits for Class B computing
devices in accordance with the specifications in Subpart B, Part 15 of
the FCC regulations. These specifications are designed to provide reasonable
protection against such interference in a residential installation. However,
there is no guarantee that interference will not occur in a particular
installation. FCC regulations require that shielded interface cables be
used with your modem.
If interference does occur, we suggest the following measures be taken
to rectify the problem: 1) Move the receiving antenna.
2) Move the modem away from the radio or TV.
3) Plug the modem into a different electrical outlet.
4) Discuss the problem with a qualified radio/TV technician.
CAUTION :
Changes or modifications not expressly approved by the party responsible
for compliance to the FCC Rules could void the user's authority to operate
this equipment.
Cable connections:
All equipment connected to this modem must use shielded cable as the interconnection
means.
Notes:
Operation is subject to the following two conditions:
(1) This device may not cause harmful interference, and
(2) This device must accept any interference received including interference
that may cause undesired operation.
Chapter
1 Introduction
Introduction
This driver supports the Conexant USB ADSL reference board. This release
contains both LAN (RFC 1483) and WAN (RFC 2364/RFC 2516).
Supported Operating Systems
- Windows 98
- Windows 2000
- Windows Me
- Windows XP
Supported ATM Protocols
- PPP over ATM VCMUX (RFC 2364) (WAN)
- PPP over ATM LLC (RFC 2364) (WAN)
- PPP over Ethernet (PPPoE) LLC SNAP (RFC 2516) (WAN)
- PPP over Ethernet (PPPoE) VCMUX (RFC 2516) (WAN)
- Bridged IP over ATM LLCSNAP (RFC 1483) (LAN)
- Routed IP over ATM LLCSNAP (RFC 1483) (LAN)
- Bridged IP over ATM VCMUX (RFC 1483) (LAN)
- Routed IP over ATM VCMUX (RFC 1483) (LAN)
- Classic IP over ATM (RFC1577)
LED Interface
There are four LED
indicators on the front panel of your ADSL USB modem as shown. In the
schematic below each of which displays an operational
status.
The LEDs from left to right are:
�@
�@

�@
|
USB
illuminated when the USB bus congests.
|
| LNK
illuminated when the ADSL transceiver is in Showtime Mode. |
| RXD
illuminated when data is received from the ADSL line . |
| PWR
illuminated when the ADSL power on. |
Chapter
2 Determine your connection settings
You need to know your
PC systems Windows OS and Internet Protocol supplied by your ADSL service
provider. Refer to the following chart for your ADSL Driver.
Protocol Selection
RFC1483 -> Bridged Ethernet over ATM
RFC2364 -> Point-to-Point Protocol over ATM
RFC2516 -> Point-to-Point Protocol over Ethernet
| ADSL
Driver Selection |
Directory
(Win98/98SE/2000/Me/XP) |
| RFC1483
-> Bridged Ethernet over ATM |
CD-ROM:\
Driver\LAN |
| RFC2364
-> Point-to-Point Protocol over ATM |
CD-ROM:\
Driver\WAN |
| RFC2516
-> Point-to-Point Protocol over Ethernet |
CD-ROM:\
Driver\WAN |
Having determined the ADSL Driver you will be installing, you now need
to gather the connection information supplied by your ADSL service provider.
VPI value:
VCI value:
Framing:
- VC
/ MUX
- LLC
/ SNAP
Mode:
- ITU-T G.992.1 (G.dmt)
- ITU-T G.992.2 (G.lite)
- ANSI TI.413
Issue2
- Annex A and Annex B (option)
For
RFC1483
|
For
RFC2364 or 2516 |
|
| Host: |
User
Name: |
| Domain: |
Password: |
| Gateway: |
Host
or IP Address: |
| IP
Address: |
|
| Subnet
Mask: |
|
| DNS
or server address: |
|
Chapter
3 Install the driver and make a connection
You will be installing
drivers and then proceeding to make an Internet connection. This process
requires you to enter in information as prompted by the Microsoft Installation
Wizard.
<Note>
You may need the Microsoft Windows Operating System installation files
(CAB files) to complete the installation. The CAB files are contained
in the Microsoft's system CD-ROM. Some systems may have already installed
the CAB files to the hard drive, but you should have the Microsoft Windows
CD-ROM handy just in case.
Proceed now to the installation procedure for the Windows Operating
System installed in your computer.
Windows 98/98SE
Windows 2000
Windows Me
Windows XP
3.1
Windows 98 / 98SE
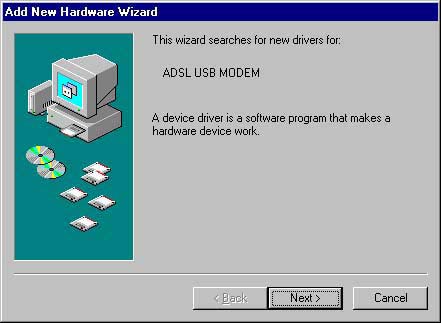
<Step01>
Insert the USB Plug into the USB port of ADSL USB.
The Add New Hardware Wizard window will automatically appear
to indicate that a new USB Network Controller has been found.
Click Next.
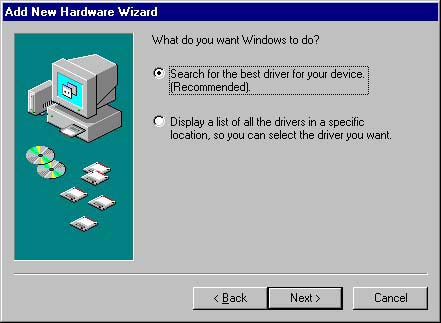
<Step02>
Still in the Add New Hardware Wizard. You will be asked "What
do you want Windows to do?" Select the Search for the best driver
for your device option, then click Next.
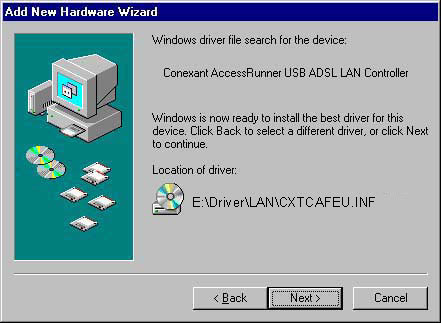
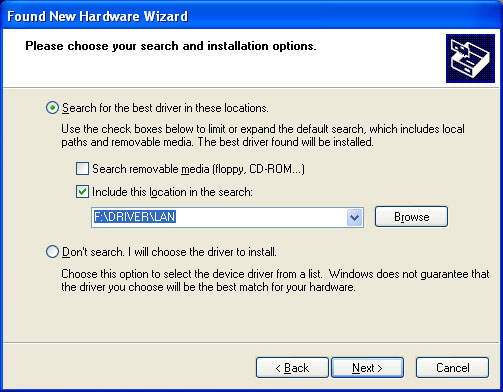
<Step03>
Insert the ADSL Driver CD into your systems CD-ROM drive, Select
Driver Directory LAN or WAN, Then click Next.
If you need to set for RFC 1483 to select LAN subdirectory and for RFC
2516/2364 to select WAN subdirectory.

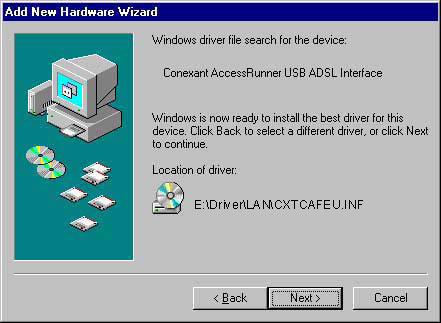
<Step04>
The Add New Hardware Wizard will appear and indicate the Conexant
AccessRunner USB ADSL Interface has been recognized and will install
a new driver. Click Next.
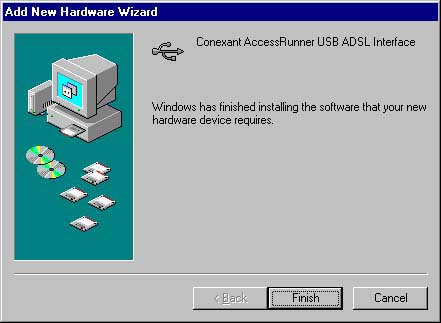
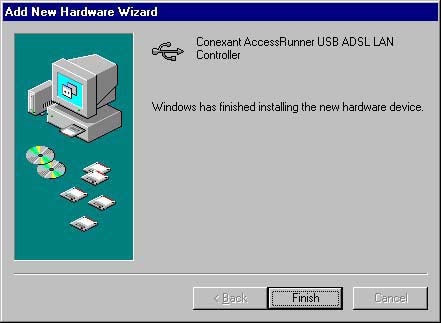
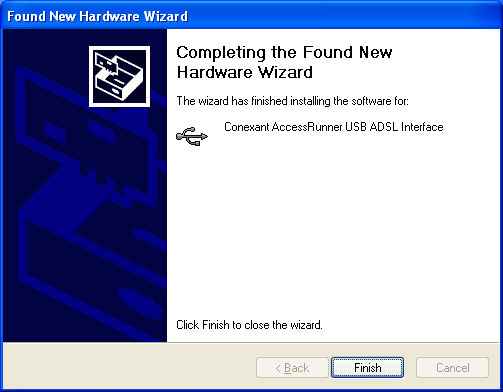
<Step05>
At the conclusion of the ADSL modem driver installation, the Add New
Hardware Wizard window appears and displays your new installed Conexant
AccessRunner USB ADSL Interface. Click Finish.
3.1.1 Setting the ADSL VPI & VCI For RFC 1483/2364/2516
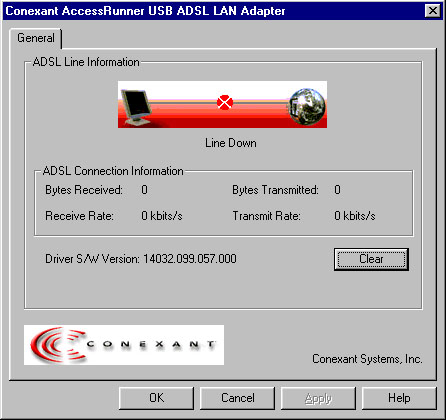
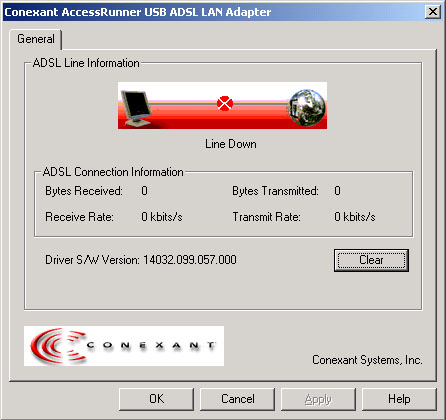
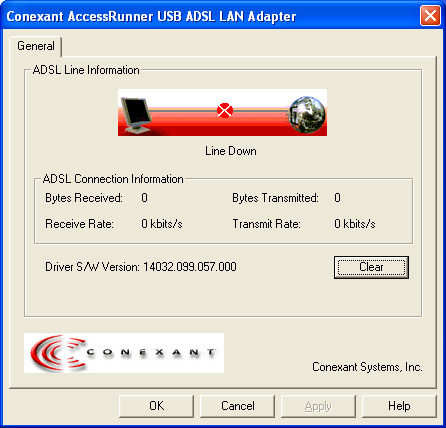
<Step01>
Double click the "Conexant AccessRunner" Icon in Control
Panel or on the desktop.
- You can use Alt-P or Alt-C to make sure or change VPI / VCI.
- Make sure the VPI & VCI without problem.
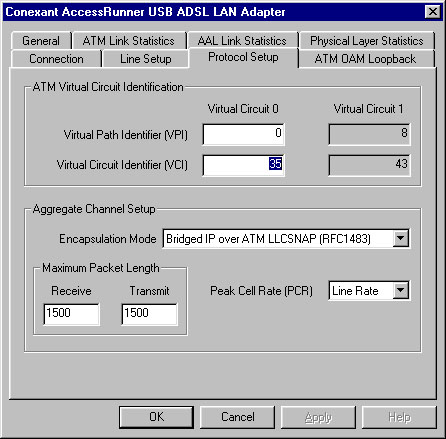
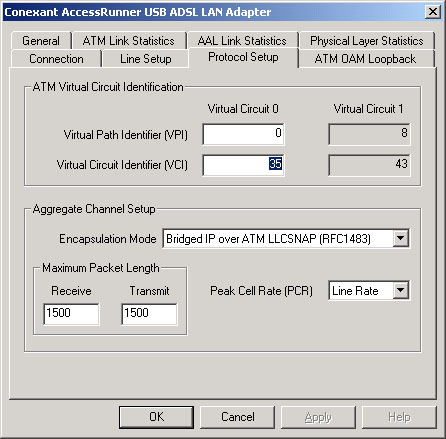
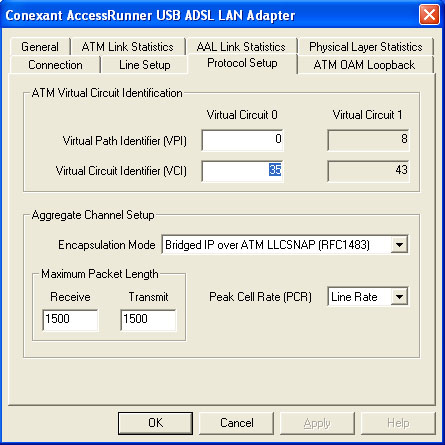
<Step02>
This is the Network Protocol and PVC settings section. Enter in the VPI
& VCI and Framing values supplied by your ADSL service provider. Press
"Apply".
When you install LAN mode, you can select several modes from "Ecapsulation
mode", such as "Bridged IP over ATM LLC SNAP (RFC1483)",
"Routed IP over ATM LLC SNAP (RFC1483)", "Bridged IP over
ATM VCMUX (RFC1483)" or "Routed IP over ATM VCMUX (RFC1483)".
When you install WAN mode, you can select several modes from "Ecapsulation
mode", such as "PPP over ATM VCMUX (RFC2364)", "PPP
over ATM LLC SNAP (RFC 2364)", "PPP over Ethernet LLC SNAP (RFC
2516)" or "PPP over Ethernet VCMUX (RFC 2516)".
Chapter 3.1.2 Making a RFC 1483 connection - Win98/98SE
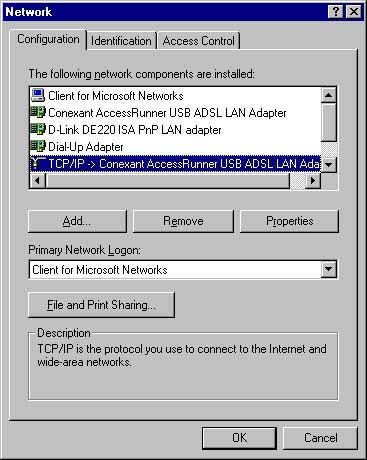
<Step01>
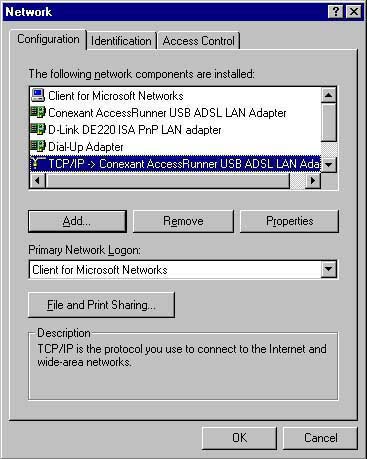
From the Start menu on the tool bar, select Settings,
Control Panel and then double-click on the Network icon. The
Network window appears. Select the Configuration tab, scroll
the installed network component window and find Conexant AccessRunner
USB ADSL LAN Adapter.

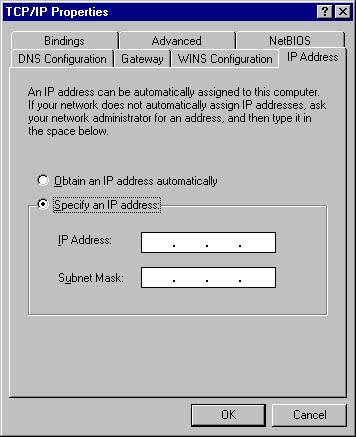
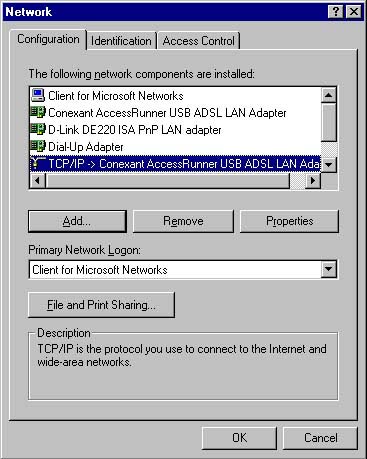
<Step02>
Scroll the installed network component window and select TCP/IP ->
Conexant AccessRunner USB ADSL LAN Adapter. Then click the Properties
button. The TCP/IP Properties window will appear. Select the IP
Address tab and then select the Specify an IP Address option.
Enter the IP Address and Subnet Mask settings supplied by
your ADSL provider.

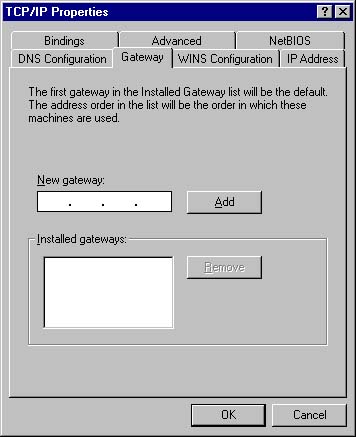
<Step03>
To setup a new gateway, select the Gateway tab, and then enter
the setting in the New Gateway section. Click Add. Select
DNS Configuration tab.

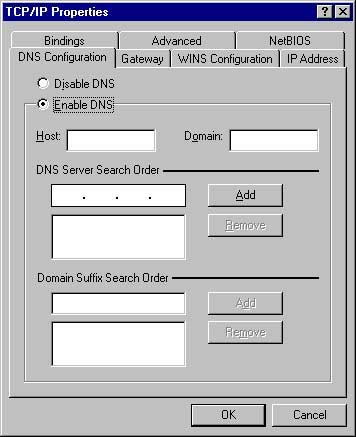
<Step04>
Select the Enable DNS option.
- Enter your host name into Host: box.
- Enter your domain name into Domain: box.
- Enter DNS number into DNS Server Search Order box
and click Add. If you have more than one DNS numbers, repeat
this step.
- After setting all the necessary TCP/IP properties, click OK.
<Step05> The Network window appears. Click OK.
Chapter
3.1.3 Making a RFC 2364/2516 connection - Win98/98SE
After installation, you will find AccessRunner DSL shortcut on the
desktop. You can use it to dial out and make a connection with your ISP.
<Step01>
Click the Access Runner DSL on the desktop and enter the User Name
and Password supplied by your Internet service provider (ISP).
Then click Connect.
<Step02>
The Connection Established window appear. Inernet service
is now established. Click Close and then the Diagnostic tool icon
will appear on the task bar.
Chapter
3.2 Windows 2000
Insert USB plug into USB port of ADSL modem.
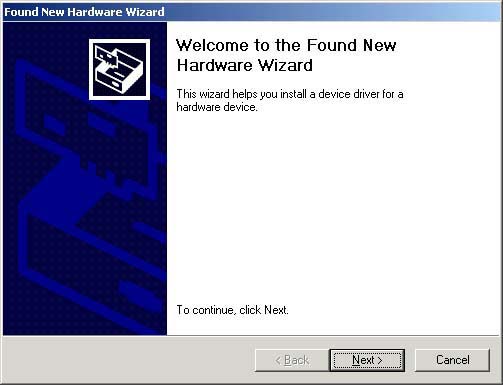
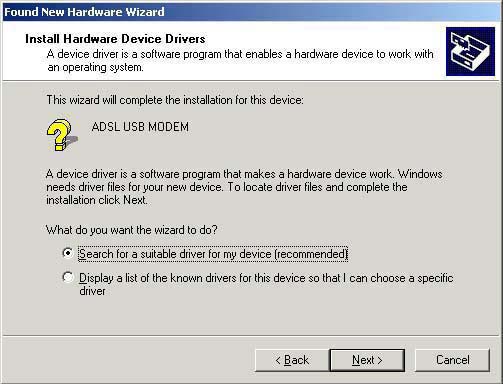
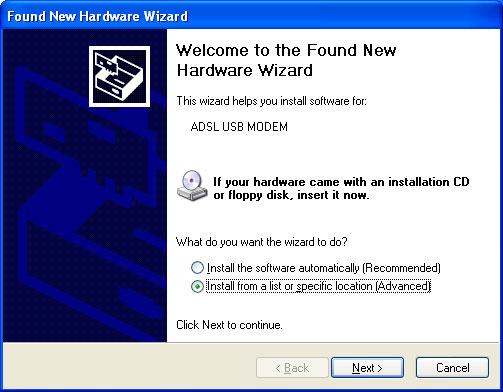
<Step01>
After inserting, the Found New Hardware Wizard will appear.
Click Next.
<Step02>
Still in the Found New Hardware Wizard, select the Search for
a suitable device... option. Click Next.
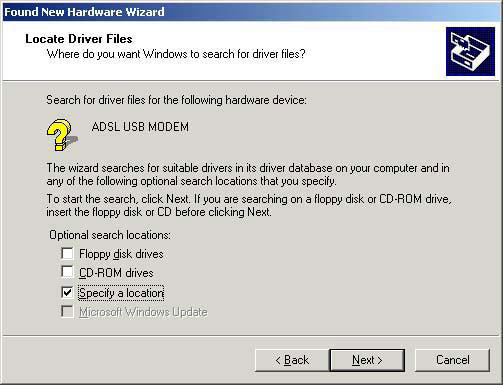
<Step03>
Next
you will be prompted for software drivers. Select specify a location.
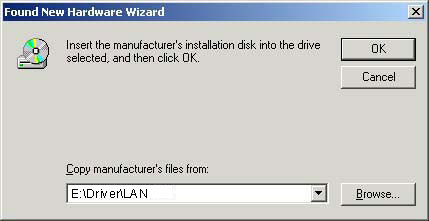
<Step04>
Insert the ADSL Driver CD into your systems CD-ROM drive, Select
Driver Directory LAN or WAN,Then click OK.
If you need to set for RFC 1483 to select LAN subdirectory and for
RFC 2516/2364 to select WAN sub directory.
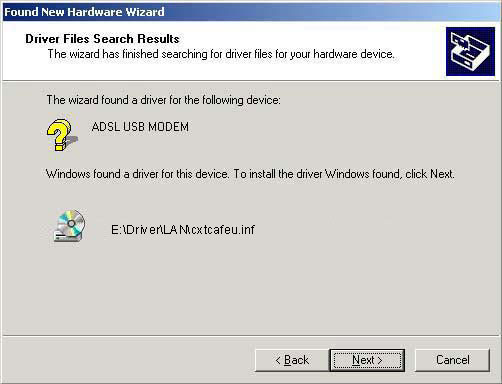
<Step05>
The Found New Hardware Wizard will then find the ADSL USB
MODEM, click Next.
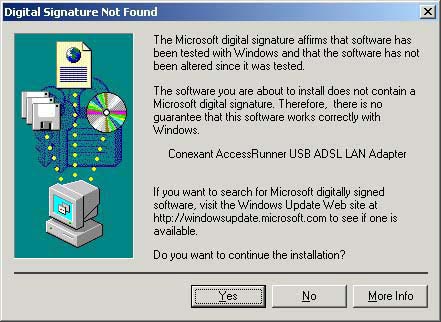
<Step06>
The Digital Signature Not Found window appears. You will be asked;
Do you want to continue installation? Click Yes.
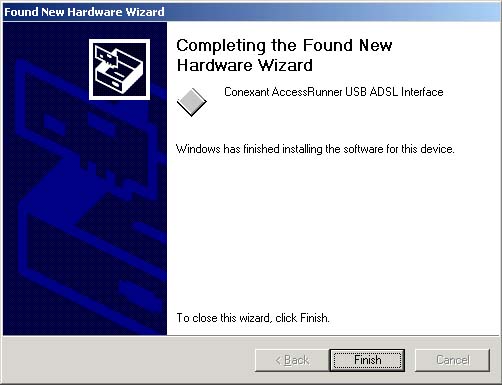
<Step07>
The Found New Hardware Wizard will prompt that Windows has finished
installing the software for this device, then Click Finish.
Chapter
3.2.1 Setting the ADSL VPI & VCI For RFC 1483/2364/2516
<Step01>
Double click the "Conexant AccessRunner" Icon in Control
Panel or on desktop.
- You can use Alt-P or Alt-C to make sure or change VPI / VCI.
- Make sure the VPI & VCI without problem.
<Step02>
This is the Network Protocol and PVC settings section. Enter in the VPI
& VCI and Framing values supplied by your ADSL service provider. Press
"Apply".
When you install LAN mode, you can select several modes from "Ecapsulation
mode", such as "Bridged IP over ATM LLC SNAP (RFC1483)",
"Routed IP over ATM LLC SNAP (RFC1483)", "Bridged IP over
ATM VCMUX (RFC1483)" or "Routed IP over ATM VCMUX (RFC1483)".
When you install WAN mode, you can select several modes from "Ecapsulation
mode", such as "PPP over ATM VCMUX (RFC2364)", "PPP
over ATM LLC SNAP (RFC 2364)", "PPP over Ethernet LLC SNAP (RFC
2516)" or "PPP over Ethernet VCMUX (RFC 2516)".
Chapter
3.2.2 Making a RFC 1483 connection - Win2000
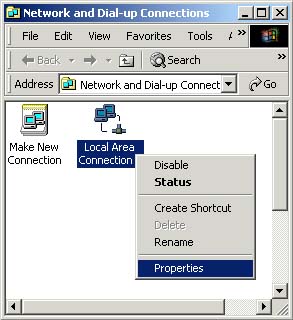
<Step01>
Double-click My Computer, Control Panel and then Network
and Dial-up Connection,
The Network and Dial-up Connections window appears. Right-click
on the Local Area Connection, and then click on properties.
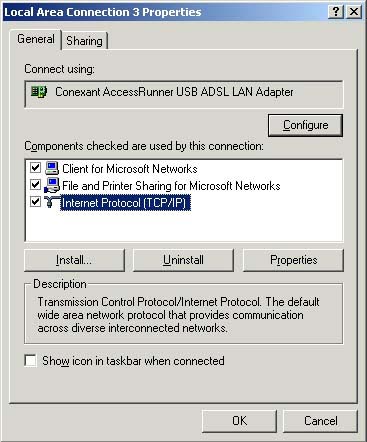
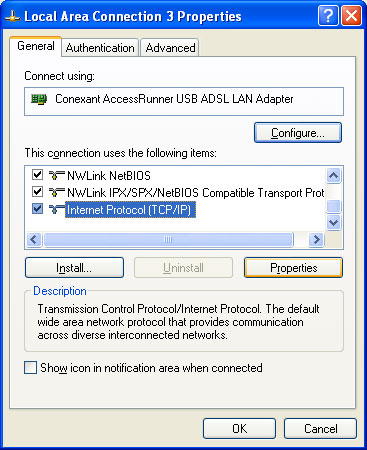
<Step02>
The Local Area Connection window appears. Click on Internet
Protocol (TCP/IP), then click on Properties.
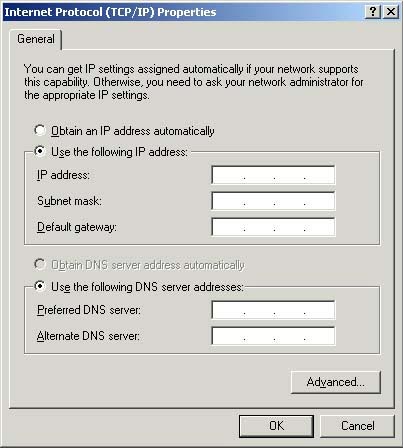
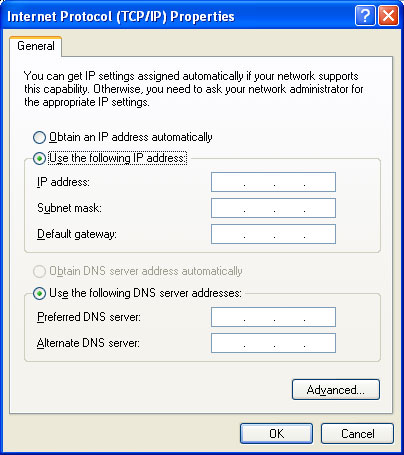
<Step03>
The Internet Protocol (TCP/IP) window appears. Under the General
tab, enable Use the following IP address. The default settings
for IP configurations will turn from gray to clear. Enter in the IP
address, Subnet Mask, and Default Gateway supplied by your
ADSL service provider. Click OK.
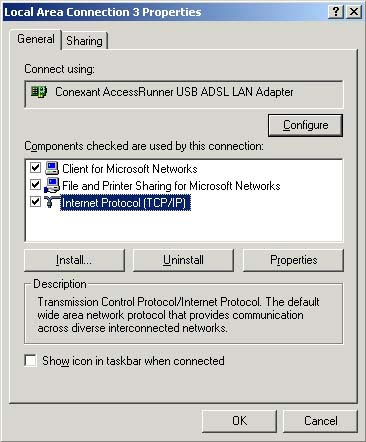
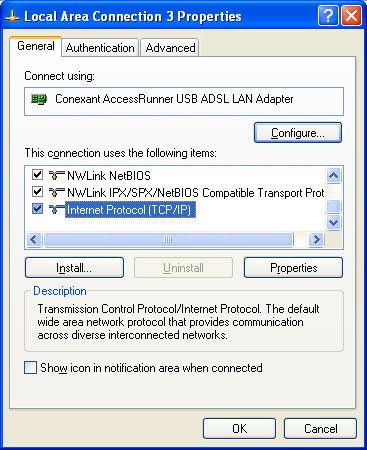
<Step04>
The previous General Tab window appears. Click OK.
Chapter
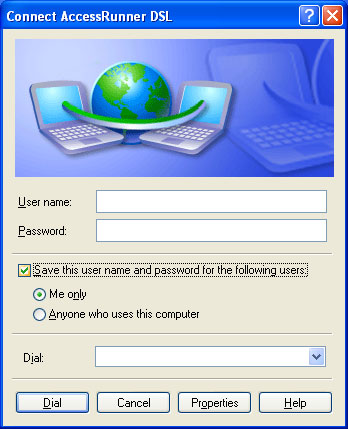
3.2.3 Making a RFC 2364/2516 connection - Win2000
After installation, you will find AccessRunner DSL shortcut on the
desktop. You can use it to dial out and make a connection with your ISP.
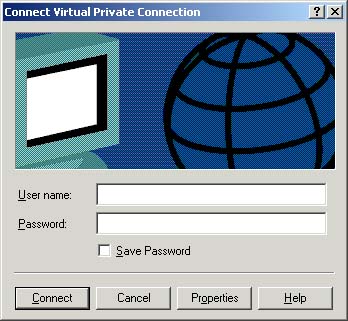
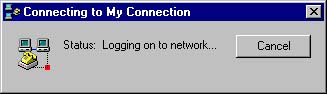
<Step01>
The Connect My Connection window will appear. Enter your User
Name and Password supplied by your ADSL service provider. You
are now ready to make a network connection, Click Dial.
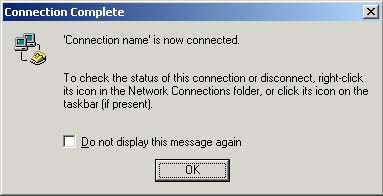
<Step02>
The Connection complete window appears, click OK.
Chapter 3.3 Windows Me
Insert the USB plug into the USB port of ADSL modem.
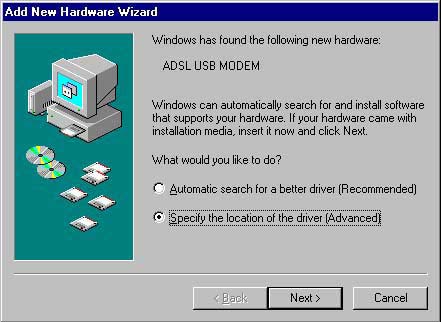
<Step01>
The Add New Hardware Wizard window will automatically appear
to indicate that a new ADSL USB MODEM has been found. Select the
Specify the location of the driver option. Click Next.
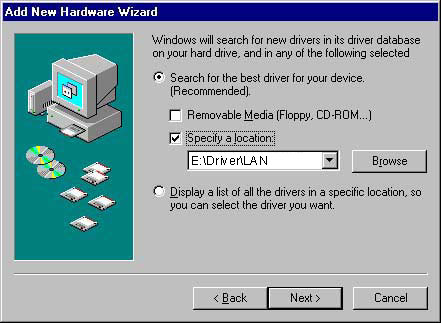
<Step02>
Insert the ADSL Driver CD into your systems CD-ROM drive, Select
Driver Directory LAN or WAN,Then click Next.
If you need to set for RFC 1483 to select LAN subdirectory and for
RFC 2516/2364 to select WAN sub directory.
<Step03>
The Add New Hardware Wizard will appear and indicate the Conexant
AccessRunner USB ADSL Interface has been recognized and will install
a new driver. Click Next.
<Step04>
At the conclusion of the ADSL modem driver installation, the Add New
Hardware Wizard window appears and displays your newly installed
Conexant AccessRunner USB ADSL Interface, then click Finish.
Chapter
3.3.1 Setting the ADSL VPI & VCI For RFC 1483/2364/2516
<Step01>
Double click the "Conexant AccessRunner" Icon in Control
Panel.
- You can use Alt-P or Alt-C to make sure or change VPI / VCI.
- Make sure the VPI & VCI without problem.

<Step02>
This is the Network Protocol and PVC settings section. Enter in the VPI
& VCI and Framing values supplied by your ADSL service provider. Press
"Apply".
When you install LAN mode, you can select several modes from "Ecapsulation
mode", such as "Bridged IP over ATM LLC SNAP (RFC1483)",
"Routed IP over ATM LLC SNAP (RFC1483)", "Bridged IP over
ATM VCMUX (RFC1483)" or "Routed IP over ATM VCMUX (RFC1483)".
When you install WAN mode, you can select several modes from "Ecapsulation
mode", such as "PPP over ATM VCMUX (RFC2364)", "PPP
over ATM LLC SNAP (RFC 2364)", "PPP over Ethernet LLC SNAP (RFC
2516)" or "PPP over Ethernet VCMUX (RFC 2516)".

Chapter
3.3.2 Marking a RFC 1483 Connection - WinMe
<Step01>
From the Start menu on the tool bar, select Settings,
Control Panel and then double-click on the Network icon.
The Network window appears. Select the Configuration tab,
scroll the installed network component window and find Conexant AccessRunner
USB ADSL LAN Adapter.
<Step02>
Scroll the installed network component window and select TCP/IP
-> Conexant AccessRunner USB ADSL LAN Adapter. Then click the Properties
button. The TCP/IP Properties window will appear. Select the IP
Address tab and then select the Specify an IP Address option.
Enter the IP Address and Subnet Mask settings supplied by
your ADSL provider.
<Step03>
To setup a new gateway, select the Gateway tab, and then enter
the setting in the New Gateway section. Click Add. Select
DNS Configuration tab.
<Step04>
Select the Enable DNS option.
- Enter your host name into Host: box.
- Enter your domain name into Domain: box.
- Enter DNS number into DNS Server Search Order box
and click Add. If you have more than one DNS numbers, repeat
this step.
- After setting all the necessary TCP/IP properties, click OK.

<Step05> The Network window appears, Click OK.
Chapter
3.3.3 Making a RFC 2364/2516 Connection - WinMe
After installation, you will find AccessRunner DSL shortcut on the
desktop. You can use it to dial out and make a connection with your ISP.
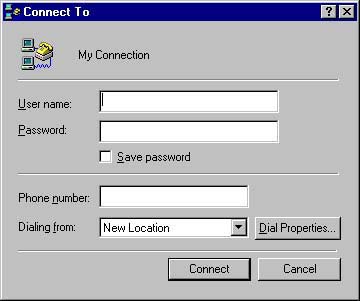
<Step01>
The Connect To window appears. Enter the User Name and
Password supplied by your Internet service provider (ISP). Then
click Connect.

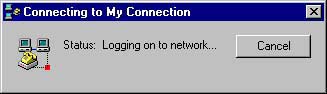
<Step02>
The Connection Established window appear. Internet service
is now established. Click Close and then the Diagnostic tool icon
will appear on the task bar.
Chapter 3.4 Windows XP
Note:
Please take out the Ethernet cable or other WAN connection line on
your computer before plug USB port into ADSL USB Modem. Because Windows XP
will get the different driver from Internet, that causes you cannot install
ADSL USB with right driver we provided.
Insert USB plug into the USB port of ADSL modem.
<Step01>
The Add New Hardware Wizard window will automatically appear
to indicate that a new ADSL USB Modem has been found. Select the
Specify the location of the driver option. Click Next.
<Step02>
Insert the ADSL Driver CD into your systems CD-ROM drive, Select
Driver Directory LAN or WAN,Then click Next.
If you need to set for RFC 1483 to select LAN subdirectory and for
RFC 2516/2364 to select WAN sub directory.
If you Red ever been setup driver, you should select.
<Step03>
At the conclusion of the ADSL modem driver installation, the Add New
Hardware Wizard window appears and displays your newly installed
Conexant AccessRunner USB ADSL Interface, then click Finish.
Chapter
3.4.1 Setting the ADSL VPI & VCI For RFC 1483/2364/2516
<Step01>
Double click the "Conexant AccessRunner" Icon in Control
Panel or on the desktop.
- You can use Alt-P or Alt-C to make sure or change VPI / VCI.
- Make sure the VPI & VCI without problem.
<Step02>
This is the Network Protocol and PVC settings section. Enter in the VPI
& VCI and Framing values supplied by your ADSL service provider. Press
"Apply".
When you install LAN mode, you can select several modes from "Ecapsulation
mode", such as "Bridged IP over ATM LLC SNAP (RFC1483)",
"Routed IP over ATM LLC SNAP (RFC1483)", "Bridged IP over
ATM VCMUX (RFC1483)" or "Routed IP over ATM VCMUX (RFC1483)".
When you install WAN mode, you can select several modes from "Ecapsulation
mode", such as "PPP over ATM VCMUX (RFC2364)", "PPP
over ATM LLC SNAP (RFC 2364)", "PPP over Ethernet LLC SNAP (RFC
2516)" or "PPP over Ethernet VCMUX (RFC 2516)".
Chapter
3.4.2 Marking a RFC 1483 Connection - WinXP
<Step01>
From the Start menu on the tool bar, select Control Panel
and then double-click on the Network connection icon. The Network
connection window appears.Scroll installed network component window
and find Conexant AccessRunner USB ADSL LAN Adapter, Click right
key and select properties.
<Step02>
Scroll the installed network component window and select TCP/IP.
Then click the Properties button. The TCP/IP Properties
window will appear. Select the IP Address tab and then select the
Specify an IP Address option. Enter the IP Address, Subnet
Mask, default gateway and DNS server settings supplied by your ADSL
provider.
<Step03>
The Network window appears. Click OK.
Chapter
3.4.3 Making a RFC 2364/2516 Connection - WinXP
After installation, you will find AccessRunner DSL shortcut on the
desktop. You can use it to dial out and make a connection with your ISP.
<Step01>
The Connect To window appears. Enter the User Name and
Password supplied by your Internet service provider (ISP). Then
click Connect.
<Step02>
The Connection Established window appear. Internet service
is now established. Click Close and then the Diagnostic tool icon
will appear on the task bar.
Declaration of CE
This declaration of conformity is according to article 7(3) and article
10(2) of the Council of European Communities of 3 May 1989.
The protection requirements according the Council Directive article 4
and Annex III are kept.
MODEL / TYPE: ADSL-USB
This declaration is given from the manufacturer
submitted by
TRAINING RESEARCH CO., LTD.
5F,. NO. 571, SEC. 7, CHUNG HSIAO E. RD.,
TAIPEI, TAIWAN, R. O. C.
To the judgement of the products with regard to electromagnetic
compatibility according following regulations:
EN 55022 Class B
EN 50082 - 1 (IEC 801 Part 2,4 / ENV 50140 / ENV 50141)
EN 60950
Declaration
of conformity to type
I hereby declare that the product
MODEL/TYPE: ADSL-USB
and satisfies all the technical regulations applicable to the product
within the scope
of Council Directives 91/263/EEC and 93/97/EEC: TBR21
The equipment has been approved to [Commission Decision No. 98/34/EG]
for
Pan-European single terminal connection to the Public Switched Telephone
Network (PSTN). However, due to differences between the individual PSTNs
provided
in different countries the approval does not, of itself, give an unconditional
assurance of successful operation on every PSTN network termination point.
In the event of problems,
you should contact your equipment supplier in the first instance.
Part
No.:506-10134-00
|
