My Delphi components:
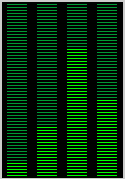
- TSCCoolProgBar A funny
progress bar
- TSCSwitchToggle A
funny switch
- TSCBlinkingLed A
blinking bitmap
Send me an E-mail if you have any comments,
questions or bug report.
If you find some component useful, I
would enjoy hearing about it!![]()
Please visit my new web site http://sebcosta.altervista.org