|
|
|
|
|
|
Rendering the Finished Product
Once you finish your animation project, you must render it to create a finished movie that can be played back on the device of your choice.
For more information, see Rendering.
To render your composite as a QuickTime movie:
- Choose File | Render.
The Render Queue dialog appears.
- Enter the path and name for the rendered file(s) in the Filename field.
Note: You can also click the Filename button to enter a path and name using the file browser.
- Select QuickTime from the Format list, and then click the Options button to the right of the Format list to specify the QuickTime compression settings. For more information on these settings, see Rendering.
- To speed up rendering time, set the Quality to Preview and the Frame Size to Half.
Note: If you were rendering a final project, you would set these values to the maximum quality possible.
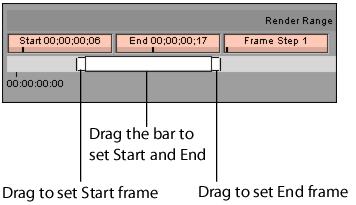
- Enter the first frame to render in the Start field. Enter the last frame to render in the End field. By default, the entire project is rendered.
- Click Process.
combustion begins rendering your project. The status of your rendering is displayed on the Status bars and in the Statistics panel.
Note: You should not use your computer for other tasks while rendering, as this can have a significant impact on the time it takes to render your project.
|
|
|