|
|
|
|
|
|
Keyframing
You can animate a layer by setting at least two keyframes for the layer's categories at different times. A keyframe is a point in time that records any change to a layer in your workspace.
Before you can create keyframes, you have to enable the Animate button. For more information on animating, see Keyframing.
To animate a layer using keyframes:
- Enable the Animate button (A).
- Select a layer (for instance, we select the Vanes layer from the illustration above to rotate the windmill's vanes).
- Press the Home key to move to the first frame of the animation.
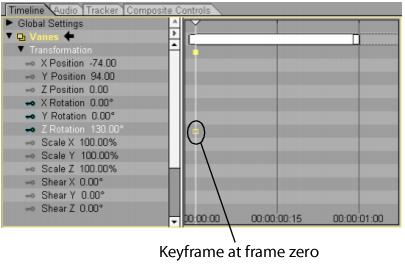
- Use the Transform controls to set a rotation category at the first frame of the animation. For instance, set the Z Rotation to 130°.
- Click the Timeline tab, expand the layer that you want to animate, and then expand the Transformation category.
You can see a keyframe has been set for the Z Position channel.
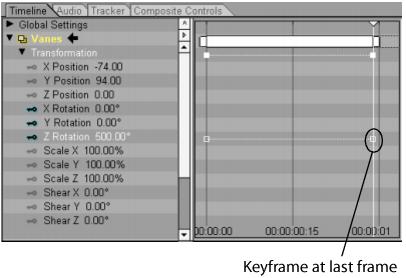
- Press the End key to move to the last frame.
- Change the value for the Z Rotation channel. To do so, click and drag your cursor over the Z Rotation value in the Timeline list, or click the Composite Controls tab and use the Transform controls.
A keyframe is set at the last frame. The values between the keyframes are determined automatically using interpolation.
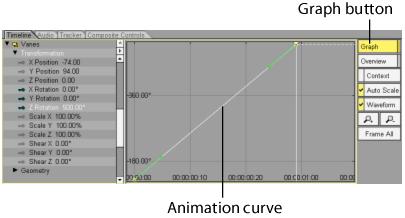
- Click the Graph button to see the shape of the interpolated animation curve.
- Move back to the first frame, and then press the Play button
on the playback controls to watch the animation.
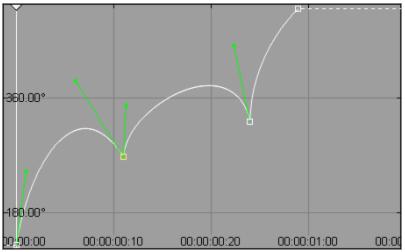
Note: You can adjust the shape of the animation curve between keyframes to create customized animations.
For information on adjusting animation curves, see Editing Keyframes and Animation Curves.
|
|
|